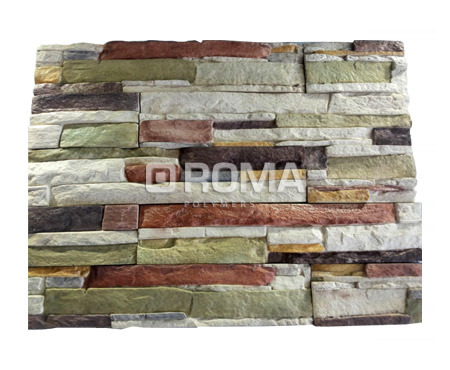
Transforming your space into a stunning interior can be both exciting and overwhelming. One innovative way to add texture, color, and uniqueness to your walls is by using rubber wall tiles moulds. These versatile moulds allow you to create custom designs that can elevate the aesthetics of any room. Here’s a straightforward guide to help you get started on your journey to revamp your interiors with rubber wall tiles moulds.
Step 1: Choose Your Design
Start by selecting a design for your rubber wall tiles. The beauty of using moulds is that you can choose from a wide variety of patterns, textures, and sizes. Whether you prefer geometric patterns, natural textures, or something truly unique, make sure the design complements the overall theme of your room.
Step 2: Gather Your Materials
For this project, you’ll need rubber wall tiles moulds, a mixing solution (usually a combination of water and a specific rubber mix), a spatula or mixer, and a clean, flat surface to work on. Ensure you have protective gloves and eyewear for safety.
Step 3: Prepare the Mixture
Follow the instructions provided with your rubber mix to prepare the moulding solution. The key here is to achieve a consistency that’s easy to work with—neither too thick nor too runny. Mix thoroughly to avoid air bubbles, which can affect the final outcome.
Step 4: Pour Into Moulds
Carefully pour the mixture into your rubber wall tiles moulds. Gently tap the sides of the moulds to release any trapped air bubbles. This step is crucial for ensuring a smooth surface on your tiles.
Step 5: Let It Set
Allow the mixture to set as per the time recommended by the rubber mix manufacturer. This can vary, but it’s usually a few hours. Patience is key; ensuring the rubber sets properly will make the demoulding process smoother.
Step 6: Remove and Cure
Once set, gently remove the tiles from the moulds. If you’ve mixed and poured correctly, they should come out easily. Place the tiles in a well-ventilated area to cure further, if necessary. This process enhances the durability of the tiles.
Step 7: Installation
Installing your rubber wall tiles can be done using adhesive recommended for rubber materials. Apply the adhesive both on the tile and the wall to ensure a strong bond. Position the tiles carefully, pressing firmly to secure them in place.
Step 8: Finishing Touches
Once all tiles are installed, you can add finishing touches. Some might prefer to seal the tiles for extra protection or to enhance their color. Sealing is optional and depends on the look you’re aiming for and the location of the tiles.
Step 9: Enjoy Your New Space
Congratulations! You’ve successfully transformed your room with stunning rubber wall tiles. The unique texture and custom designs will surely add character and depth to your interiors.
Additional Tips:
- Experiment with color pigments in your rubber mix to add a pop of color to your tiles.
- Consider the room’s humidity and temperature when installing rubber wall tiles, as extreme conditions might affect their longevity.
- Always wear protective gear when handling chemicals or heavy materials.
Creating stunning interiors with rubber wall tiles moulds is a rewarding DIY project that not only enhances the beauty of your space but also allows for personal creativity. With these steps, you’re well on your way to designing a unique, stylish, and durable wall feature that will captivate everyone who sees it.
